SciFig

Free Wiring Diagram Maker

Make each connection clear. Name the components and terminals, add wire IDs and colors, then download a drawing you can reopen and revise.

Describe what you need in the box above.

Start with up to 150 free credits|No credit card required

Get up to 350 free credits on day one when you join through an invite.

3 figure engines · 500+ templatesEvery label editable · 60+ color schemesEditable PPTX · Layered SVG · 8K PNG / JPG

Draw terminal-to-terminal wiring

Choose components, label their terminals and connect the endpoints with named wires. Download the drawing or save its settings for later edits.

Use two to eight components, two to four terminals per component and one to twelve wires. Colors distinguish the connections you enter. The connection key lists each wire ID and its terminal endpoints.

Components

Components 1
Components 2
Components 3

Wires

Wires 1
Wires 2
Wires 3

Free Wiring Diagram Maker— templates & examples

Updated

Components, terminals and labeled wires

Free Wiring Diagram Maker

Keep component names, terminal labels and individual wire connections together in a drawing you can download and edit.

SciFig’s free wiring diagram maker lets you choose component symbols, label their terminals and connect specific endpoints. Give every wire its own ID and choose a color to distinguish it in the preview. Edit the connection list as your example changes, then download SVG or PNG. Save the JSON settings to retain the components, terminals and wires for another revision.

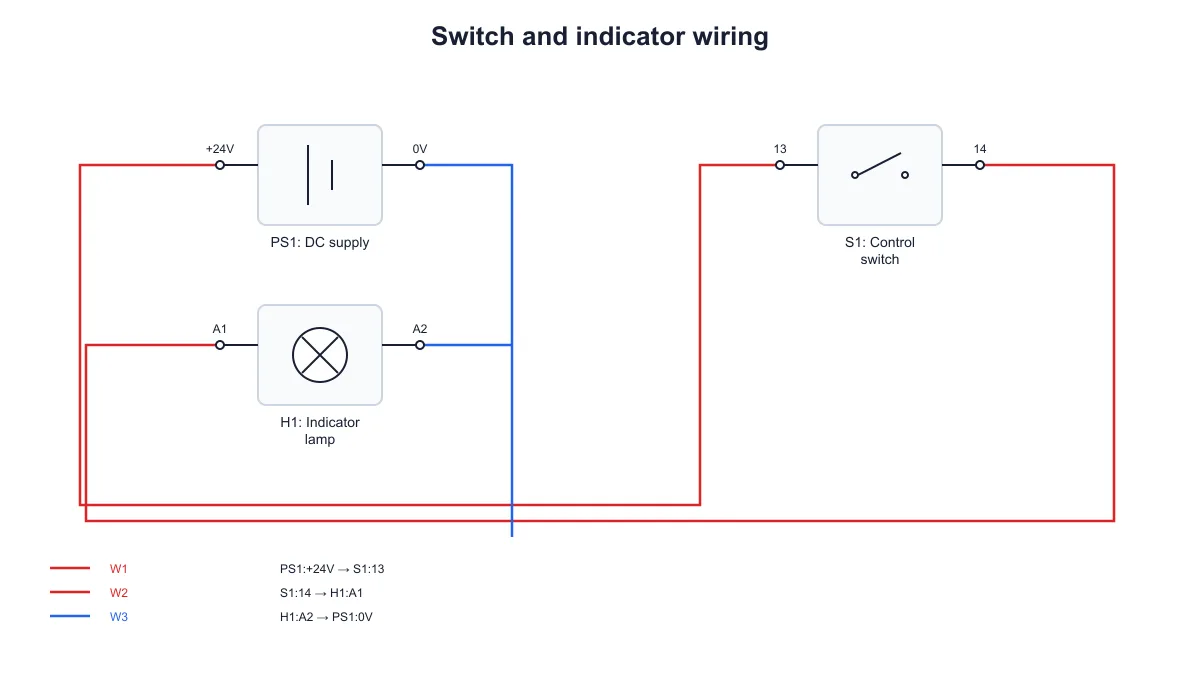
DC supply, switch and indicator lamp with three labeled terminal-to-terminal wires
  • Choose component symbols
  • Label each connection terminal
  • Assign wire IDs and colors
  • Export the drawing and save its inputs

Wiring Diagram Maker Features

Build the drawing around the actual endpoints and wire labels you want readers to follow.

Choose components and name their terminals

Select a power source, switch, lamp, terminal block, resistor or general component symbol, then give it an ID and a descriptive name. Label the terminals so the connection points correspond to your example. SciFig’s free wiring diagram maker keeps the component and terminal references together when you edit their identifiers.

  • Choose from the available component symbols
  • Give each component a unique ID
  • Name the terminals used in your example
Try this in SciFig

Connect specific terminal endpoints

Select a source terminal and a destination terminal for each wire. The preview draws the connection between those endpoints, while the wire list keeps the references available for review. Use terminal labels such as numbered contacts or connector pins to make clear which connection belongs at each end of the wire.

  • Select both endpoints explicitly
  • Keep references connected to existing terminals
  • Review the connection list beside the figure
Try this in SciFig

Distinguish wires by ID and color

Give every wire a unique ID and choose one of the available colors to distinguish its path in the diagram. IDs remain useful when similar routes appear together or when the figure is discussed in written notes. Use the labels and colors that match your example, rather than relying on color alone to identify a connection. The key below the diagram lists each wire ID and its terminal endpoints.

  • Assign individual wire IDs
  • Choose a color for each connection
  • Trace wires by their labels and endpoints
Try this in SciFig

Download the drawing and save its settings

Export SVG for further vector editing or PNG for a document, worksheet or slide. Save the JSON settings when you want to retain the component types, IDs, terminal labels and wire connections. Reopen those settings in the free wiring diagram maker to update the example and download a revised figure.

  • Export SVG or PNG
  • Save components and wire references
  • Reopen the same diagram for changes
Try this in SciFig

How to Make a Wiring Diagram

Set up the components, connect their terminals and check the wire labels before export.

  1. Add and name the components

    Choose the symbols needed for your example and enter a unique component ID and a descriptive label. Add or remove components to match the connections you want to explain.

  2. Label the terminals

    Give the terminals readable labels such as contact numbers or connector pins. Keep the labels consistent with the names used in your source material so readers can recognize the endpoints.

  3. Connect the endpoints and label the wires

    For each wire, select its source and destination terminals, enter a unique wire ID and choose a color. Check the connection list and preview together to confirm that the references match your intended drawing.

  4. Download and keep the diagram inputs

    Export SVG or PNG for your document or presentation. Save the JSON settings alongside the drawing so you can reopen the components, terminals and wire list when you need to revise the example.

Wiring Diagrams for Terminal Connections

Use explicit endpoints to explain small connection examples and keep their labels consistent.

DC supply, switch and indicator lamp with three labeled terminal-to-terminal wires

Explain a switch and indicator connection

Use a supply, switch and lamp to show how the wires join specific terminals. Label the switch contacts and lamp terminals, then give each wire an ID. Export the wiring diagram for a lesson or a discussion about following connections through a drawing.

Explore this example
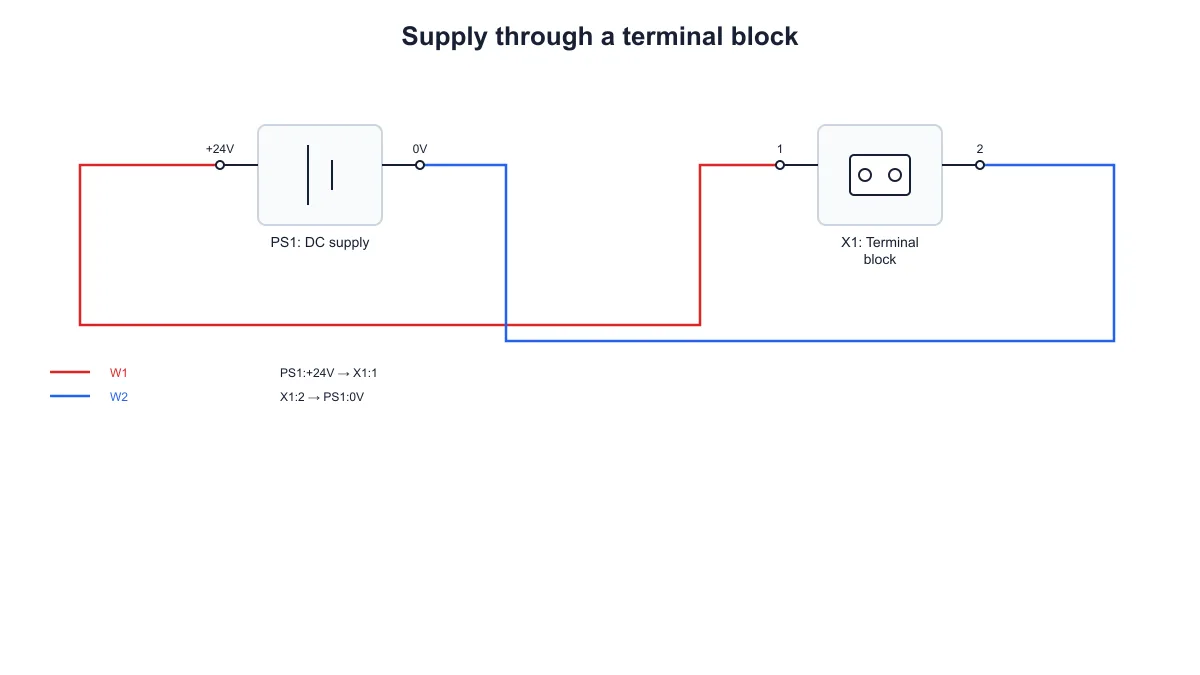
DC supply connected to two numbered terminal-block points by red and blue wires

Show a terminal-block connection

Place a terminal block beside the supply symbol and name its connection points. Use separate wire IDs for the outgoing and returning paths. The diagram keeps the endpoints visible so readers can relate each wire to the terminal labels in your accompanying notes.

Explore this example

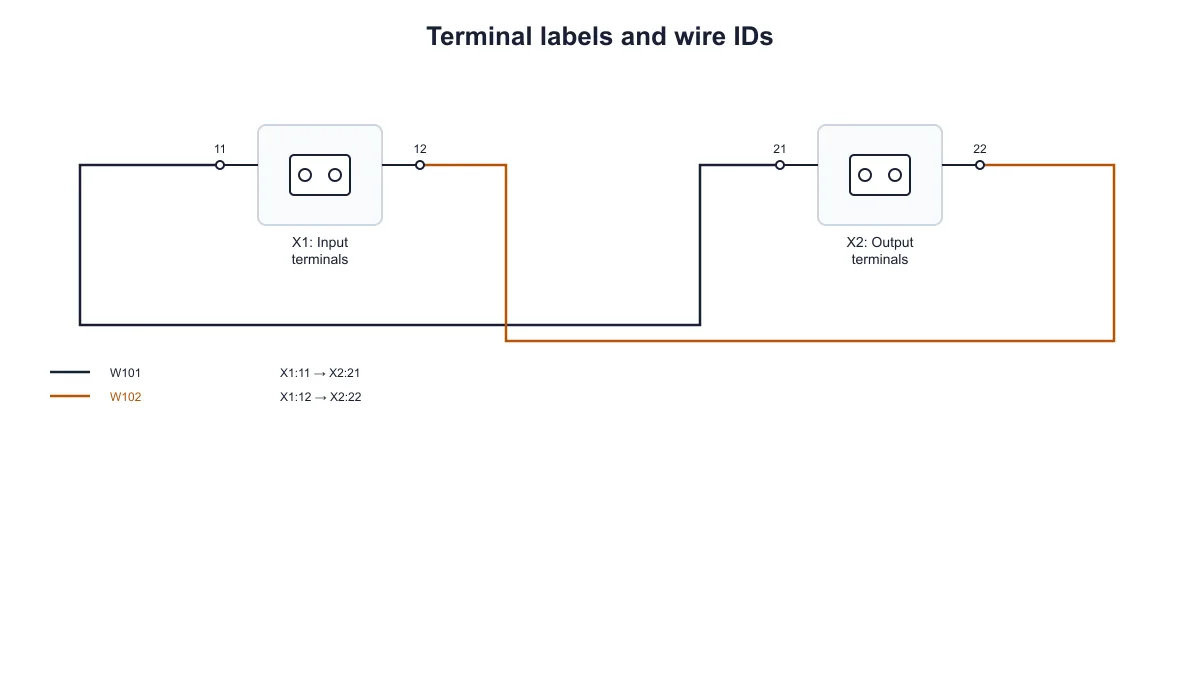
Two numbered terminal blocks connected by wires W101 and W102

Map numbered terminals between components

Give the two components meaningful IDs and label their terminals with the numbers used in your example. Connect the corresponding endpoints and choose distinct wire labels. Use the exported figure beside a connection list so readers can follow the mapping in both forms.

Explore this example

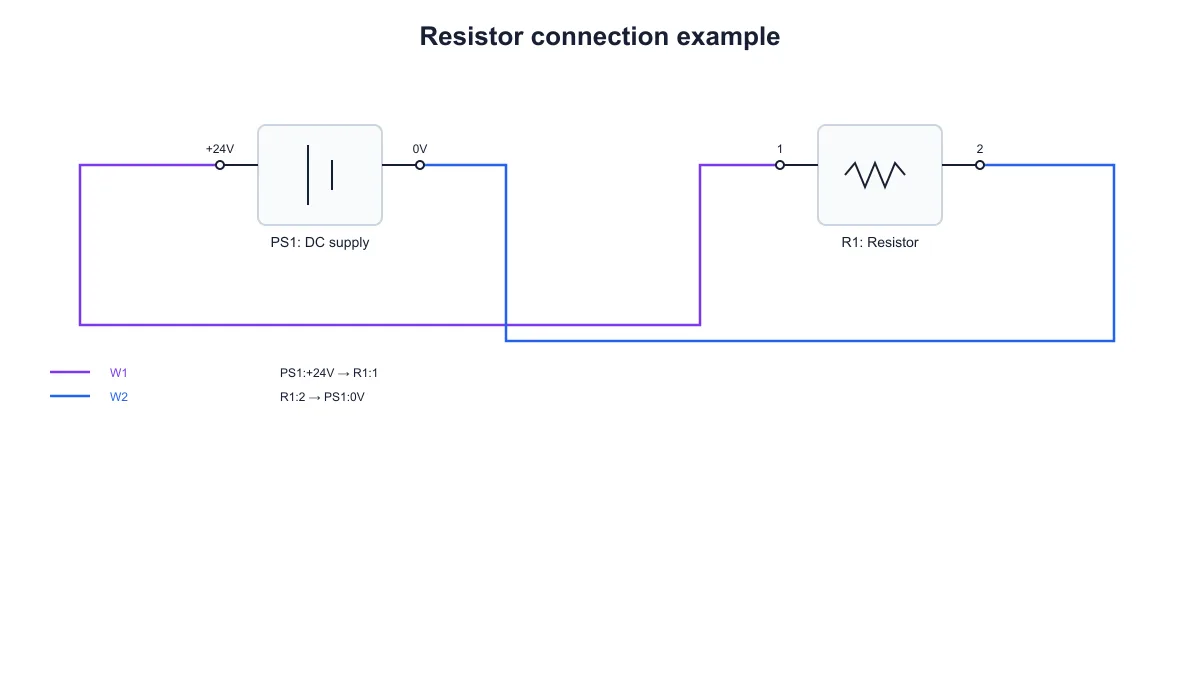
Supply and resistor symbols linked through two individually labeled terminals

Prepare a resistor wiring example

Use the resistor and supply symbols to explain an individual connection path. Enter the terminal labels and choose wire IDs that match the exercise. The free wiring diagram maker produces the figure from those references, ready to place next to the written explanation.

Explore this example
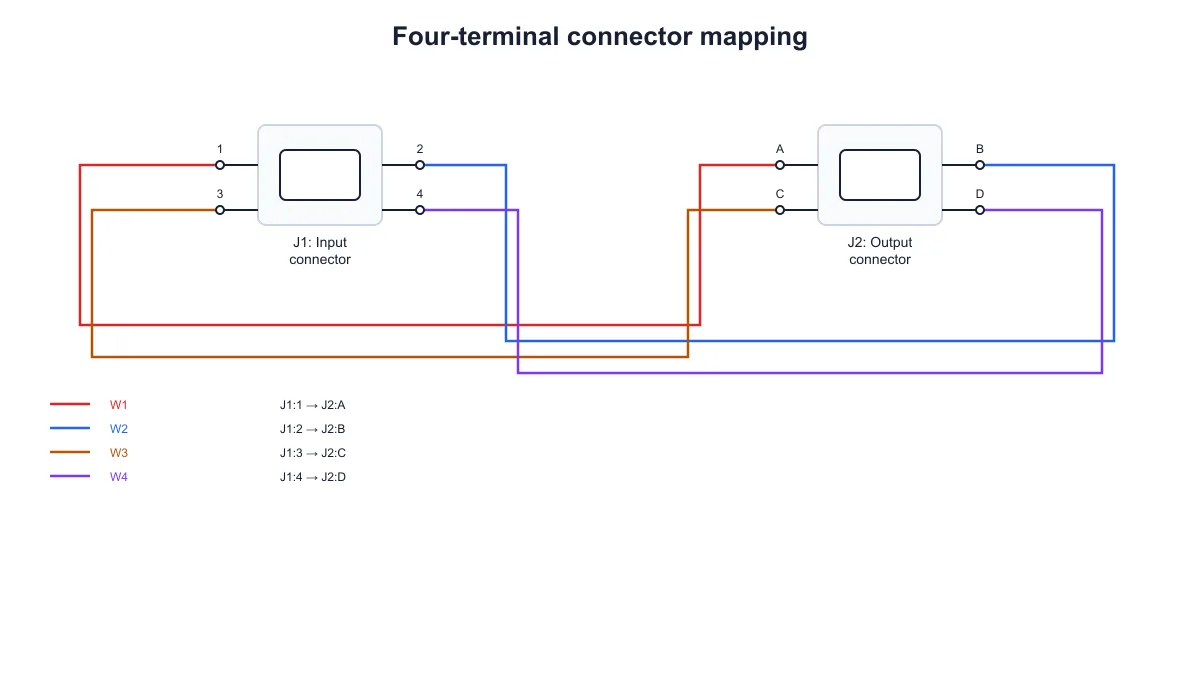
Four numbered connector terminals mapped to A, B, C and D with individual wire IDs and colors

Compare connector pin mappings

Use general component symbols with several labeled terminals to show a connector mapping. Give each connection its own ID and color, then review the wire list before exporting. Save the settings when you want to update a pin label or compare another mapping later.

Explore this example
DC supply, switch and indicator lamp with three labeled terminal-to-terminal wires

Choose the right level of electrical detail

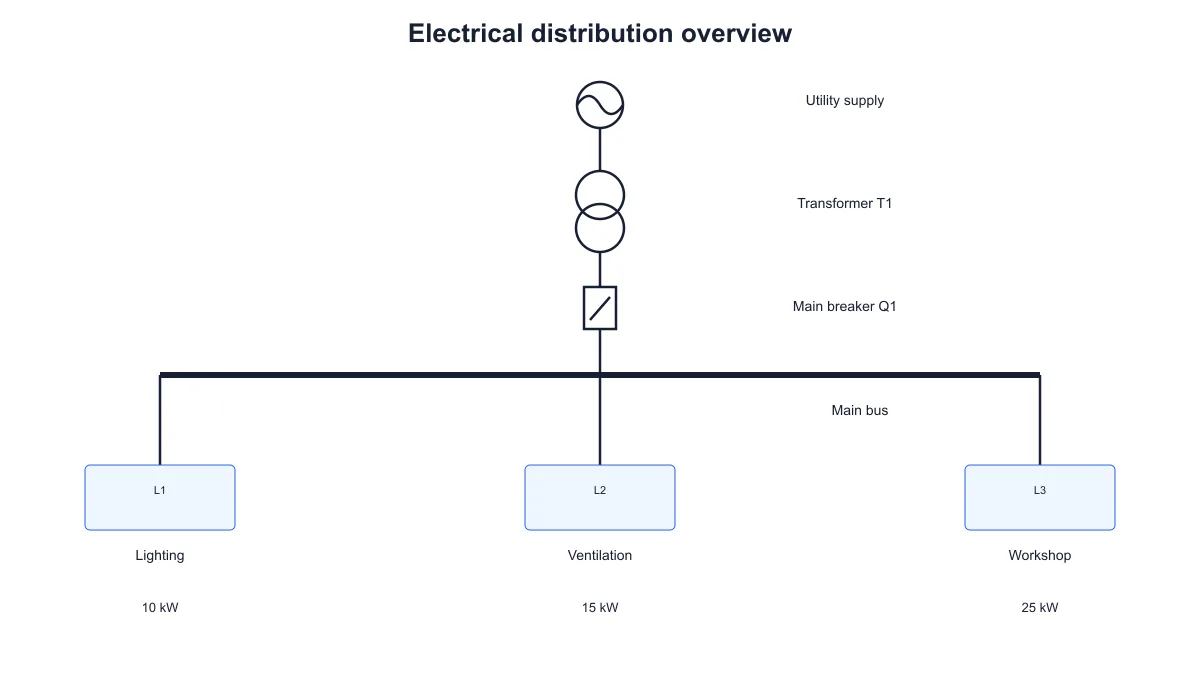
Use terminal-to-terminal wiring when individual endpoints and wire identifiers matter. If your explanation focuses on the shared supply, transformer, breaker, bus and load branches, continue to SciFig’s single line diagram generator for that simplified equipment overview.

Explore this example
How Researchers Use SciFig

I needed a small wiring example where students could follow the terminal numbers and wire IDs together. The free wiring diagram maker let me enter the components and select each endpoint explicitly. I exported the figure for the worksheet and saved the settings so I could revise the contact labels for another exercise.

Daniel H.

Electrical engineering tutor, University of Leeds

Free tools

A tool for every scientific figure

110 focused generators for the scientific figure you need — each opens in the right workspace with a matching example.

Wiring Diagram Questions

1.

2.

3.

4.

5.

6.

Call to action background

Components, terminals and labeled wires

Give every wire a clear connection

Create a wiring diagram

Free to start · No credit card required · Built for researchers